Finger Painting, But Better. Much Better.
Paste papers have decorated the covers and insides of books since the days of Shakespeare. Bookbinders could take a bit of unused paste, add some pigment and inexpensively enhance their work with painted designs. My first experience with making paste paper was like finger painting, but better. Much better.
I’m fortunate and happy to count Peter Verheyen as a friend and mentor in all things book arts related. I went to his house on the first nice weather day of spring and we made paste papers in his screened-in back porch. First things first, I learned about the paste.
There are many (many!) different paste recipes and methods to making paste papers. The one Peter taught me is a starch paste recipe and uses flour and water in a 1:5 ratio. He microwaves the starch mixture until it becomes translucent. The paste is stirred and passed through a mesh strainer to remove the clumps that form, otherwise it will not spread smoothly to the paper.
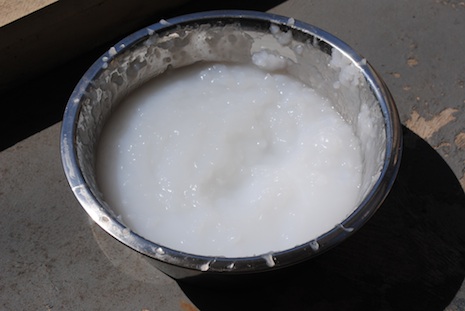
Starch Paste
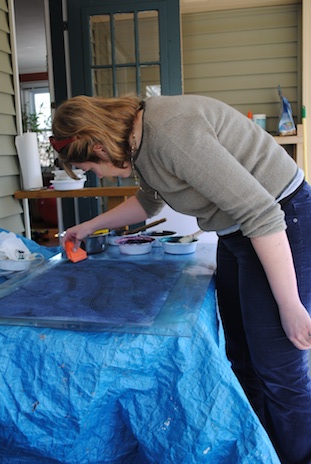
There are many ways to pigment the paste, too. We used acrylic paints.

Adding Color to the Paste
This is a wet and sometimes messy process, especially if you’re like me and can’t keep the paint off of yourself! We covered the table with a tarp and used a piece of plexiglass for the work surface. The paper is wetted on both sides, sponging from the inside out to minimize cockling. Between the wetting and the paste application this is a very damp process and it’s desirable to use a paper that has high wet strength. We used Mohawk 80# text weight.

Turning the Wet Paper Over
Once the paper is throughly wetted on both sides it’s time to apply the paste. We used large brushes to do this. The important thing is to get the paste on evenly and quickly so it doesn’t dry. While the paste is still wet you can use combs, stamps, sponges or your fingers to make designs. The limit is your imagination.
Creating a Design in the Paste
Resources for Paste Papers:
Book Arts Web: Decorative Paper Links
University of Washington: Vintage Paste Paper Pattern Examples
Top Posts & Pages


